Rings
I'd been searching for a bunch of gaudy cocktail rings that both looked correct and were affordable, but style and price and quantity never worked out, so I decided to just make them. It ended up being fantastically cheap that way, too. The first set I made with ring blanks I already had, plus 3mm and 4mm rhinestones (fortuitously left over from King George's crown).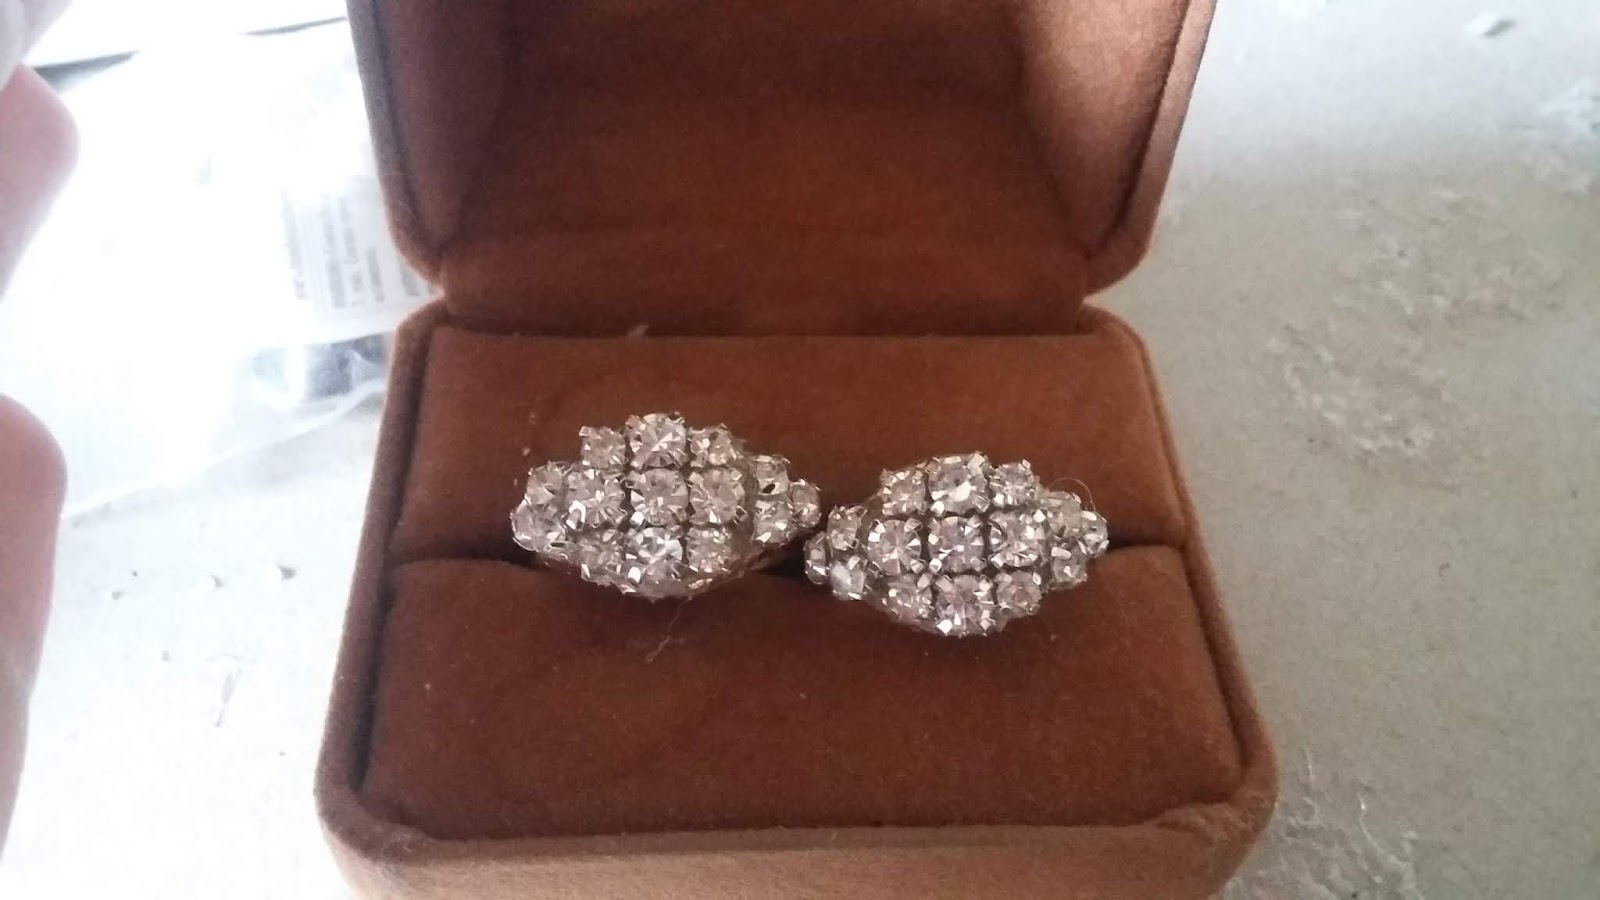
The second and third sets were "designed" (and I use that term that loosely) based on Georgian jewelry and the rhinestone sizes I had. The blanks were chosen based on size accommodation and interesting detail: the prongs on the side are reminiscent of a crown and a little more ornate, and I knew I'd be able to bend them out of the way if I needed more space for the rhinestones.
 |
| 18x25mm. Seller photo. Found here. |
 |
| 18mm. Seller photo. Found here. |

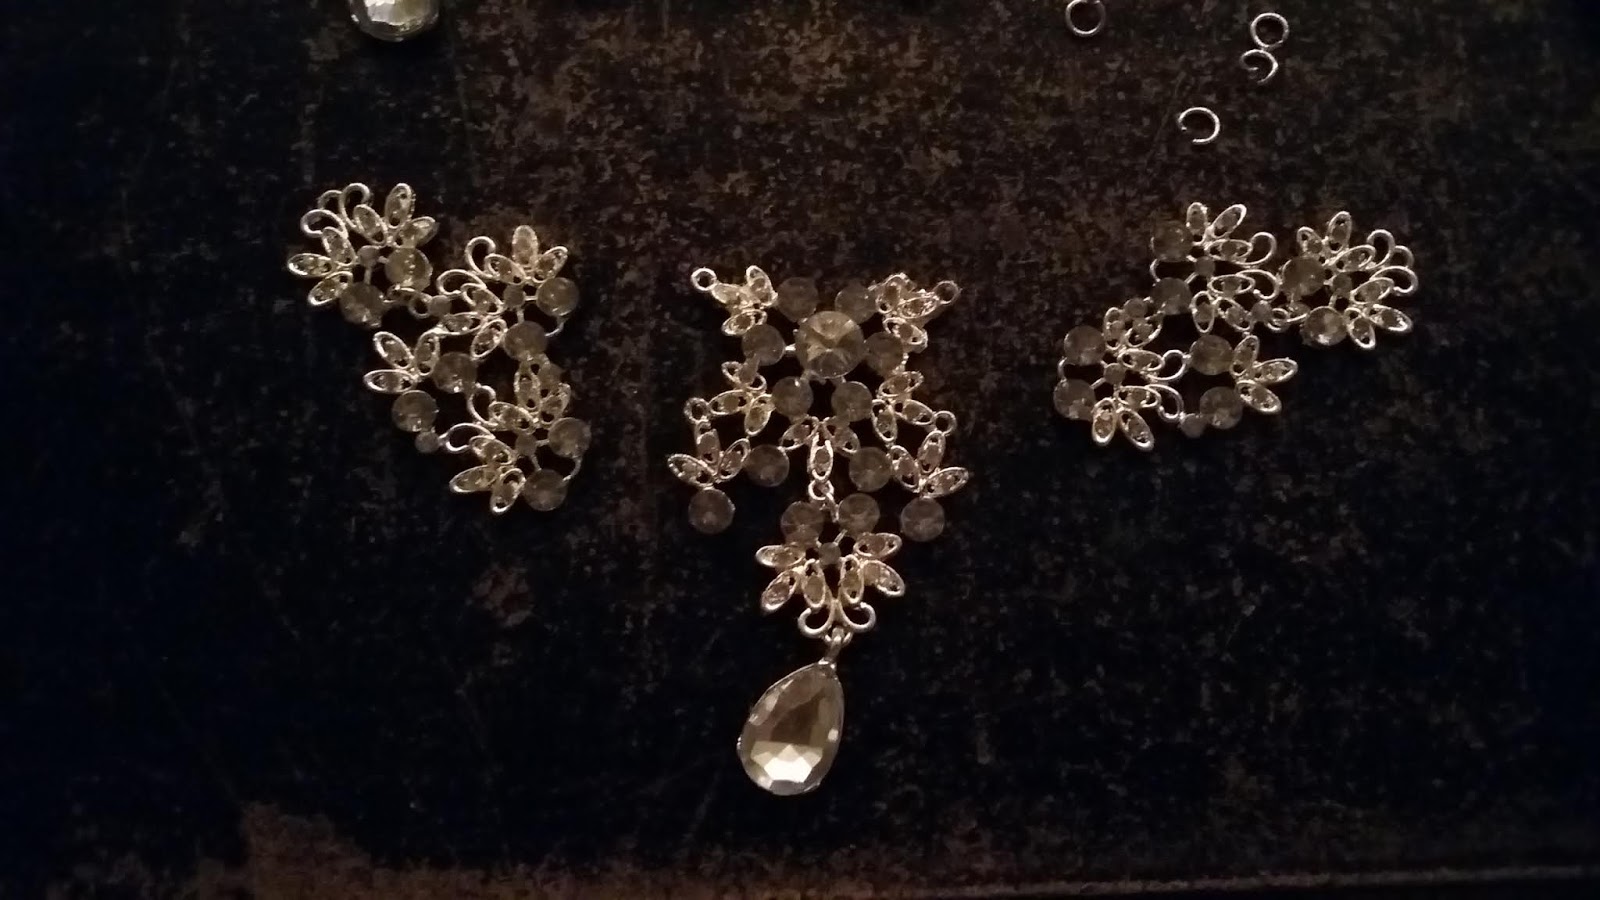
Earrings and Necklace/Brooch/Whatevers
Aside from the mini portraits I already had, earrings were the first jewelry piece I was completely decided on using. I came close to buying some really good options, but then found a necklace/earring set that looked really promising. Even though I'd scrapped the idea of a necklace in the traditional sense (too much interference with neck wound makeup), I figured I could pin the necklace to the dress like a weird brooch thing. |
| Fig. 1. Weird brooch thing. Found here. |
 |
| Don't know why I didn't photograph the earrings, too. ¯\_(ツ)_/¯ |
For the earrings, I took the posts off both pairs and the teardrop rhinestones off one pair (and set the extra teardrops aside for the necklace mod later). The piece without teardrops was turned upside-down and connected to the piece with the teardrop, and then the posts were reattached at the new top.
 |
| Earrings on the left are brand new before any mods at all, and right is the result of the second round of mods. |
Each one ended up being Frankensteined from parts of two original necklaces, the extra teardrops from the earrings, and a separate brooch. I had already ordered some brooches in a similar design to go in the hair with a bow and some ostrich feathers.
 |
| Seller photo. Found here. |
The brooches got the same paint and rhinestone treatment.
 |
| Left is repaint only, right is repainted and added rhinestones. |
 |
| There were a few minor tweaks after this, and ribbons are still up for debate, but this is pretty much before and after. |
It still wasn't quite fussy enough, so I've been playing around with some little bows of black organza ribbon. I'm still not sure about them, but if I use them, I'll add three to each side, essentially between what was originally each separate chunk.


Stay tuned for Part II!
UPDATE: On the night of the event, with everything on we decided the necklaces as brooch collar things didn't quite work how we wanted. Weirdly, it made them less ostentatious somehow. So with some extra black organza ribbon, I turned them back into necklaces. Wacky hijinks!

No comments:
Post a Comment