Current Projects

Showing posts with label Original Designs. Show all posts

Sunday, September 13, 2020

Long Beach Pirate Invasion 2019

2019 recap continues!

After a mixed bag experience in 2017 and skipping 2018, I made it back to Pirate Invasion in 2019. We did modified Jack Sparrow and Pirate!Norrington last time and enjoyed it, but this time we went full historical with our chemise dresses. They've served us well as French aristocracy at Labyrinth and French and American middle class at Huntington Beach Revolution, and were reinvented yet again for pirate shenanigans (before we wildly distressed and weathered them for French Revolution Zombaes 2.0; this was actually their last pristine outing).

Back in February as I was prepping for HB Revolution, I did a poll on Facebook asking which side I should support. After getting the clear majority vote for America and wanting to make my ancestors proud, I decided to do an American impression. But Anglomania was always kind of in the back of my mind, so I decided Pirate Invasion was the perfect chance to finally go British. And pirates are cool and all, but I'm Royal Navy trash, so here we are.

First and foremost, this meant getting to make the Horatio Nelson portrait I wanted to do for HB Revolution.
Via Royal Museums Greenwich
Except that didn't happen. And that was really the first in a long line of failures for this event.

Most of the outfit was recycled from HB Revolution—all the undergarments, dress, hat, neckerchief, sash, shoes—and I just made tweaks as needed. The petticoats got a proper hem, both shorter and cleaner and actually finished. I used similar jewelry but swapped out a few pieces to be a little more flashy (I was aiming for a slightly more aristocratic impression, and this is a much less historically accurate event). For the hat, I just added the obligatory feathers and extra ribbon I never decided on when I first made it, and used some hatpins.


I was undecided on shoes for a while. I love, love, love my Kensingtons, but they're a little rough on my feet, especially when walking on hard surfaces (at HB Revolution, walking on the grass was a lot less fraught than on the paved paths). They really need to be stretched, but I haven't got to that yet. And of any historical-esque event I do, this is one where taking shortcuts with footwear for comfort is definitely a guilt-free option. But failure #2 was deciding to wear the Kensingtons anyway, because I have too much pride and my whole ensemble was accurate and stylish enough I didn't want to compromise. Wearing the Kensingtons wasn't a complete disaster, but the discomfort was definitely distracting at times.

We ended up being probably some of the most historically accurate costumed attendees there, which was a strange experience. At cons I usually fall in the "average to good" quality category and at reenactments I feel like I'm probably somewhere between passable and good for accuracy. But we got a lot of compliments, and I think it had to do with being (humblebrag here) good quality and detailed and also standing out aesthetically from the more stylized Ren faire steampunk-ish crowd (no shade; I love those costume genres too). I even got maybe the best compliment on one of my costumes yet: "You look right out of a painting." She went with Vermeer when Gainsborough would have been a little more on point, but I'll take it. On the flip side, two people complimented our "cosplays," someone said "Oh wow, I love the Regency," and I accidentally got into a spat over the timeline of the chemise dress (our respective insistence on worn before/during/after "the Revolution" was all just a misunderstanding over which revolution each of us was talking about, but she wasn't very gracious about it). So you win some, you lose some.

There were some bad and kind of sketchy experiences with vendors and event staff that really put a damper on the whole experience, funnily enough right at the beginning and end of the day. Everything in between was pleasant enough. And ironically, despite the event usually drawing a somewhat rowdy crowd, all the attendees (and in fairness, most of the vendors) we interacted with with were pretty excellent. I really can't say whether I'll be back for a while. There's not a lot there that's a big draw to begin with, and some of these experiences left a bad enough taste. Time will tell.

Stay tuned!

Wednesday, July 1, 2020

The Great L.A. Air Raid 2019

(I'm slowly slogging my way through the backlog of events from the last year that I never got around to posting. Bear with me.)

V for victory, y'all. Big Brother Churchill is always watching. (Sweatshirt by the incomparable SoCal WACs.)
One of my costume goals for 2019 was a proper 1940s ensemble for Air Raid. What I threw together last year was cute and comfortable and not completely inaccurate, but it also left a lot to be desired. I wanted to do something more accurate and more stylish for the second outing.

I have a few pairs of 1930s-1940s heels but they all need repairs, so I didn't have shoes ready to go that worked well with a skirt or dress. I also didn't have the time or inclination to make pants unless absolutely necessary. So the plan was to shop around for pants in hopes of finding something.

Ultimately the whole look was mostly my stuff with just a few new pieces, which is always kind of gratifying. From my closet I used my go-to faux pearl necklace, black pleather low-heel oxfords, a red probably-1980s-does-1940s blouse, a vintage 1950s(ish?) black beaded cardigan, and a vintage 1950s-1960s navy blue swing coat. I added a vintage grey fur collar from the stash to the coat and also did some much-needed repairs on it. A trip to La Bomba on Retro Row got me a pair of vintage blue wool U.S. Navy uniform pants miraculously in my size, and I got a fantastic vintage-looking brass stamping airplane off Etsy and turned it into a brooch. It got a lot of compliments and was a great low-cost jewelry piece to add to the collection. As usual, my hair was improvised with pin curls. My whole look was heavily inspired by a 1946 photo of my grandmother and great-aunt, looking absolutely fabulous in trousers and fur-collared coats.
And I'm not saying my grandfather was Indiana Jones, but...


Unlike last year, we also stayed until the dance was over. The MPs herded everyone out of the fort and it was amazing.


Then we went to the after-party on the Queen Mary, and walking around the halls and decks in period clothing and seeing everyone else dressed to the nines was an amazing bit of time travel. The Observation Bar was completely overcrowded with suits and gowns and uniforms and the scene was right out of a wartime photo.


This all prompted a low-key photoshoot to take advantage of the atmosphere, and it was a lot of fun.


An anonymous Marine crashed our photos in the stairwell...
But I approved!
Off by a few decades, but of course I had to squeeze in some RMS Titanic nerdiness.
And some spooky shenanigans.

Stay tuned!

Monday, June 8, 2020

HB The Revolution 2019

(I'm slowly slogging my way through the backlog of events from the last year that I never got around to posting. Bear with me.)

Going to the Huntington Beach Historical Society's annual Revolutionary War event, The Revolution, was so much fun in 2018 that going back wasn't even a question. With chemise dresses and full undergarment sets already done, conveniently being able to go in costume was just a bonus.

I did a poll on Facebook asking which side I should support: American/French or British? A few scallywags voted British, but the overwhelming majority kept it patriotic. To be honest, my major inducement to do a British impression was because I wanted to wear a miniature portrait of Horatio Nelson c. 1781, and can you blame me?
Captain Horatio Nelson, by John Francis Rigaud, 1781, via Royal Museums Greenwich
But I did ultimately decide to go American if only to appease my ancestors.

Most of my ensemble was already done from making French Revolution Zombaes in 2018. I reused the chemise dress, sash, and most of the undergarments. To account for winter weather, I got a thicker long-sleeve shirt (cut down to elbow-length) for a new shift. To transition the costume to daywear and make it more appropriate for a middle class British North American colonist, I made a second petticoat in blue, a matching neckerchief (based on one made by The Dreamstress), a new hedgehog wig, a Gainsborough/portrait hat, and a miniature portrait of George Washington. I also wore some other vintage/antique jewelry - earrings, bracelet, and rings - from my stash. Most significantly, not wanting to wear and hide sneakers again and without any decent alternatives, I gave in and bought the American Duchess Kensingtons in oxblood I've been lusting after for ages, with the James buckles. They're admittedly a little difficult for me to wear with my foot/joint problems, but I still love them.

The hat.
With the old French Revolution Zombae wig, not the new wig


The George used in the mini portrait.
By Pierre Eugène Du Simitière, 1779, via Princeton University Library
It was chilly and breezy, not unusual for southern California in winter but definitely cooler and more blustery than the year before. (We were lucky to be there on Saturday, as on Sunday it straight up rained.) Being in thin cotton dresses, a few people asked if we were cold, but with full tights, two petticoats, stays, and a decent weight shift, we were actually quite comfortable even into the early evening when we left.
I forgot to bring cash and the library's ATM was broken so I miraculously left without any books from their Revolutionary-themed sale. I bought about 10 last year and still haven't read any of those, so really this was no big loss, though I do regret missing out on the 1776 film soundtrack record. We did find a Franco-American alliance cockade that my friend got to go with her French-inspired ensemble.

We met some fantastic people throughout the day. A photographer duo asked if they could take our photos and very kindly sent us copies after.

We also wandered into the tent of an artist who was set up selling his work and taking photos of the event, and he sent us some candid shots as well.


All in all it was a great outing, and for being my first real attempt at historical costume at a historical event I'm really pleased with the result. This will definitely be a new staple in the costume/event catalog.


Tuesday, June 25, 2019

1780s Continental Army Gainsborough/Portrait Hat

Guys, millinery is hard.

The Huntington Beach Historical Society's annual American Revolution event was back in February, and I'd been planning to attend in costume for a long time (definitively since I finished my chemise gowns in August, but theoretically even since last year's event). I had last year's French Revolution Zombaes dress and undergarments as the base, but I needed new accessories for a bit more historical realism and less theatricality. A hat was a major part of that.

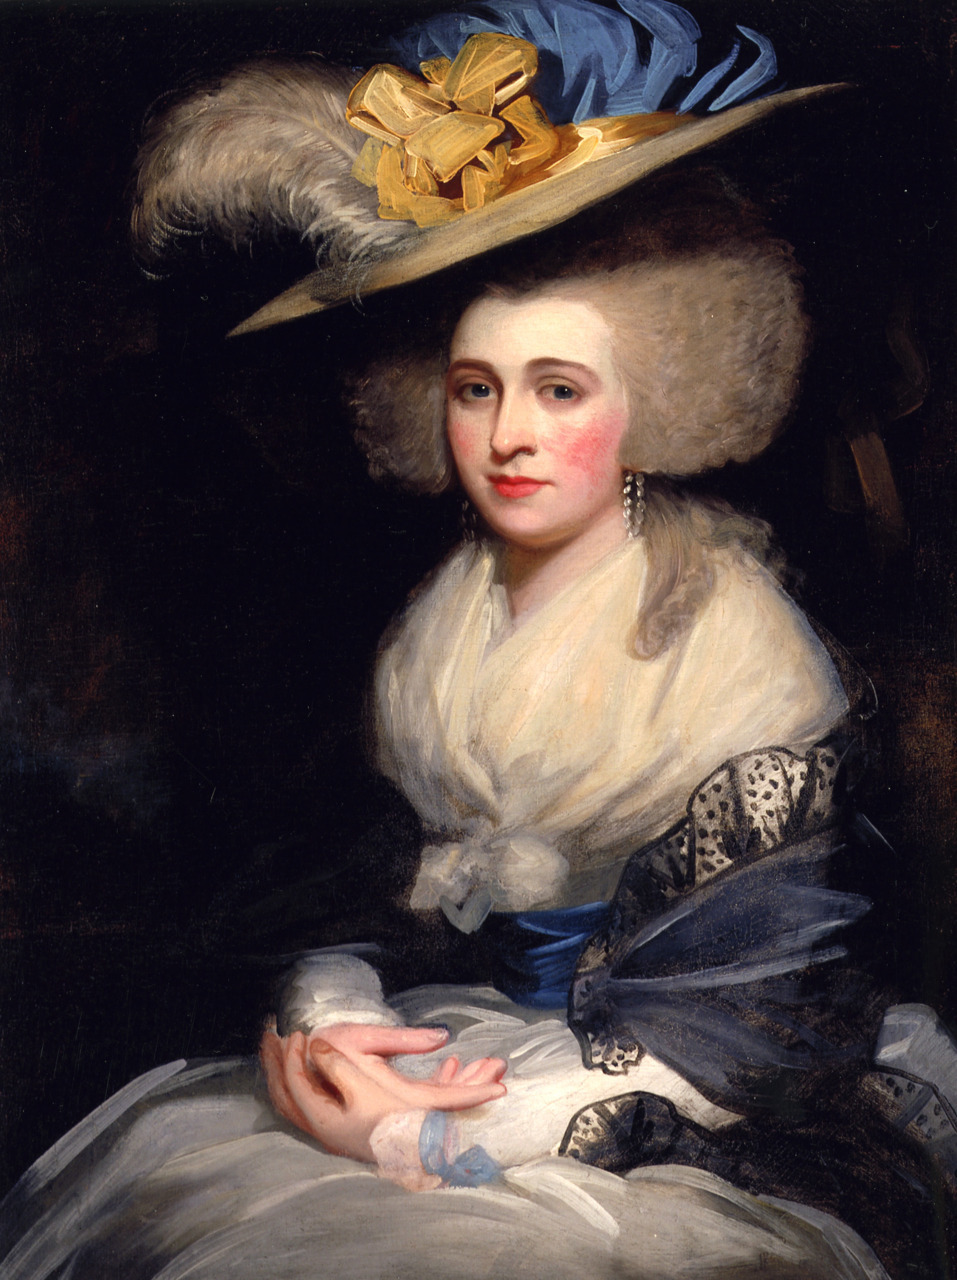
I used a lot of historical portraits and illustrations for design inspiration. Dames a la Mode's Hats From History is a great source, and this portrait in particular was one of my main starting points.
Abigail Adams Smith, 1784 via Hats From History
It took me a long time to come up with a theme and color scheme that wasn't too theme-y. I was making this for a colonial American impression.  But red, white, and blue gets real match-y real fast. I ultimately went with Continental blue, buff/white, and gold. Classic, aesthetic, and patriotic without being PATRIOTIC.

I used American Duchess's Amazing Craft Hat (Part 1 and Part 2) as a reference for construction, starting with a straw craft/gardening/? hat and reshaping the brim to give it that curve in front and back.

By chance as I was thinking about fabric options, I found navy blue silk track pants (???) and a black tulle-lined evening gown for dirt cheap at a vintage store sale. So I cut large circles from the silk and both the light and heavy tulle and stitched them together, gathered it, and glued it to the crown. (I chose not to cut the crown off the hat itself so the fabric would have a little more support if needed.)
Like actual real 100% silk track pants
  I had zero ribbon, so with my Continental theme in mind I got a few blues, gold, and off-white.
The red was an alternate waist sash idea that got scrapped and returned.
I layered some of the ribbons together and stitched/gathered those to create a trim for the crown, and did black bias tape around the brim edge.
This was the ribbon testing phase. On the hat itself I liked the right side with wider blue ribbon better, but the left looked better when worn with the white dress.

I was going to get some hatpins but ran short on time, so I did some ribbon ties at the sides instead. It's a little fussy and deformed the hat shape a little, but there's (kind of) documentation for it and it kept things secure. For future upgrades, I'll definitely be getting hatpins and maybe leaving the ties just as security but not having any real tension on them.

And that was the bulk of it done.
With my French Revolution Zombae wig, though I didn't actually wear them together.


In action at The Revolution
Just in the past few weeks I busted the hat back out for some upgrades.

Part of the reason I left it plain in February was because I couldn't decide on feathers or extra ribbon (bows, cockade, etc.). So I finally figured out a grouping of feathers I liked and made up a neat little beribboned cockade on the fly.


The cockade is a scrap of the same silk as the crown. The thin ribbon is the same from the trim around the crown, and the wider ribbon is the same as the ties. The button was from the stash.

I also tacked down the center top of the silk crown to the straw beneath to combat some problems with wind billowing the lightweight fabric too much. And I found some short hatpins in the stash. I still want a single long one that can go straight through the crown, but one of these on each side is fairly secure (if a little fiddly).

It's still not quite right to me somehow. Maybe it's still not frilly or ostentatious or large enough. But it's definitely an improvement and I'm really loving it.

Hopefully I'll get some more decent photos of this thing being worn at an outing next week.

Tuesday, June 18, 2019

18th Century Beetlejuice and Lydia Deetz

I don't even remember when this idea first happened, but in a moment of delusion a few months ago I decided this year's Labyrinth Masquerade was a good time to do our dream project of Beetlejuice and Lydia a la 18th century.

For the most part, the movie costumes will be translated fairly directly to 18th century fashion, with some embellishment of the film designs and thematic/dramatic exaggeration of historical accuracy. Beetlejuice will be a little dated in some amalgam of a 1770s-1780s zone-front gown with a redingote collar mirroring his suit. Lydia will be more fashion-forward in a mid-1780s chemise gown to mirror her blousy dress.

I'm using Simplicity 8161 with American Duchess's historical hacks as a starting point for Beetlejuice, and I'll be using the same chemise gown pattern from French Revolution Zombaes for Lydia with some added ruffles.

Everything's kind of at odds and ends right now. I've ordered Lydia's lace trim and we've got Beetlejuice swatches on the way, and I've been slowly gathering little accessory pieces and working on what we already have.

For Lydia's hair, I'm reusing my most recent hedgehog wig that I initially styled for HB Revolution earlier this year (more on that someday). The wig came with bangs which I removed, but because I'm a craft hoarder I saved the wefts so I was able to easily stitch some of them back on.


I unexpectedly found some amazing little bugs (crickets and locusts) at a small craft store during a recent visit home. Not completely sure what to do with all of them yet, but some will definitely go in Beetlejuice's hair and maybe in a few strategic places across the costume (I'm thinking on the shoes will be fun).

Luckily between everything from French Revolution Zombaes last year and the extra petticoats I did for HB Revolution this year, all the undergarments are already done which makes a project of this size feasible at all.

And because this is a big project, like French Revolution Zombaes last year, I'll probably break up the posts into topics.

Stay tuned!
Saturday, October 27, 2018

French Revolution Zombaes - Finished!

As per usual, I fell behind on documenting progress while I was busy making it. To make some attempt at recap...

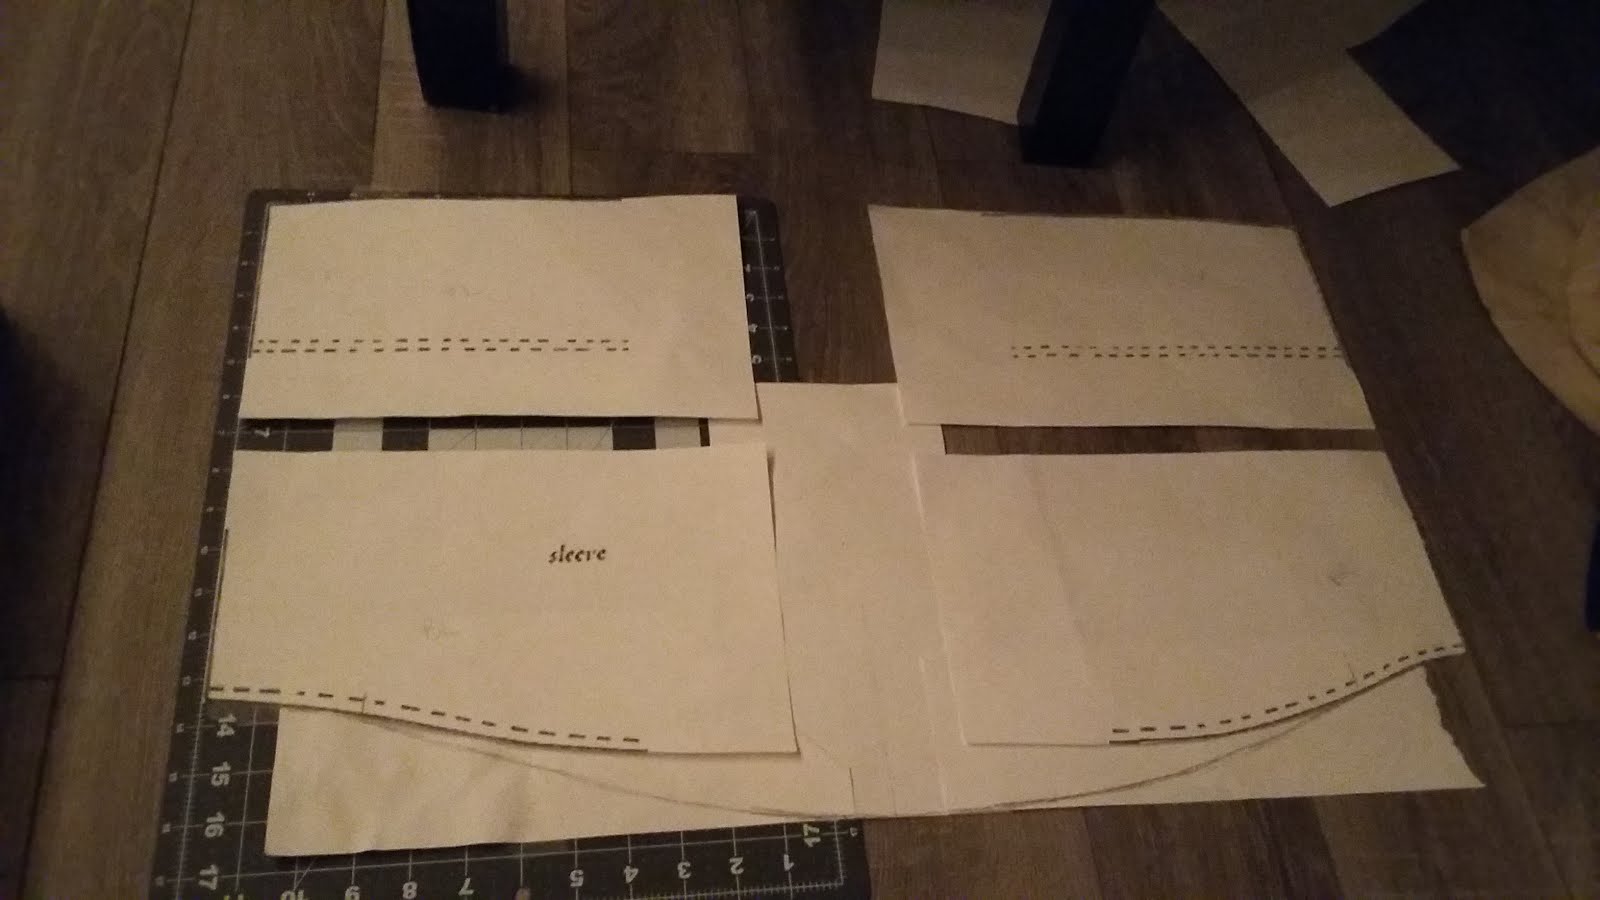
The only photo of the dress construction I have is the sleeve pattern, which was scaled up from the Norah Waugh pattern.

Figuring out patterning and construction on my own was a challenge, and frustrating at times. I'm fairly experienced with sewing, but I still prefer established patterns and instructions that I can modify as needed but have a foundation to refer back to. But it was a really good learning experience, even if I didn't always love it, and it came together wonderfully in the end.

I also made petticoats, roughly following American Duchess's old tutorial. So. Much. Pleating. But it was fun once I figured out the spacing.


We got our stays in plenty of time, and they were incredible! I did a fit/wear test right away and loved it.

As far as finishing a single piece, the wigs were probably the quickest part of the whole costume. I started with the Boogie Babe wig, which turned out to be a great cheap alternative to the Lioness wig so many people use (though I still want to get my hands on one of those someday).


There wasn't much organized method to it. I just separated and broke up the curls, and teased as I trimmed, using historical portraits as reference. I left the lower back at the base of the neck long and straightened then recurled the hair into about six sausage curls. Once styled, the wigs were sprayed with silver and then white hairspray from a party store. Since we were blending our real hair into the wig to hide the hairline, we needed something heavy to help cover and blend the different real versus fake hair colors. The silver was more opaque, so it did a pretty good job of this (though we didn't spray quite enough on our own hair the night of), but it was very silver. The white over the top helped hide it and soften everything, but some still showed through. It didn't wreck the look, and it worked okay with the ghostliness and the silver jewelry, but it wasn't what I intended. The white on its own looked great and actually replicated the look of powder really well, so that's something I'll be doing on other 18th century wigs in the future.


I don't really have any photos of them, but the "mitts" were $1 knee-high stockings bought just a day or two before the event. Everything else struck out, and they were a lifesaver. I literally just cut finger holes, and the tears and runs that developed just added to the creepy ghost/zombie theme.

And that's pretty much it!
With our awesome new friend, Lady Toxie.


A lot of stuff came down to the wire, we got a later start than we intended, and we went down to the party a few hours late. But it got done and we wore it and it was awesome! For being such an elaborate and fussy looking finished product, they're ridiculously comfortable. Even in the the short time we were there, a lot of people loved our costumes, and a surprising number actually got the whole theme. Seeing their eyes go wide with recognition was really gratifying. We got a lot of compliments on the wigs, too, which was great. We're definitely busting these out again. On these in particular, we're going to work on distressing them and making them more zombified (they were more ghoulish/ghostly this time, which actually worked well as its own thing, too). I'm also going to eventually make another set of chemise dresses with the same design and a bit more accuracy to wear to reenactment events.

I'm already on to the next project (big things afoot), so more on that soon!

Sunday, October 21, 2018

French Revolution Zombaes - BLING Part II

The saga continues...

Marie Antoinette mini portraits
I still haven't replaced older Marie's portrait. But I did make other changes to both portraits. To drive home the fact that it's Marie Antoinette and give a more obvious visual connection to royalty, I got some little crown brooches to add on. This was also inspired by royal family orders, which feature a crown above a portrait of the royal/monarch on a ribbon. Beauty From Ashes has great information and tutorials on royal family orders.

I looked for a simple design that was similar to the portrait settings, and it had to have rhinestones of course.
I didn't think to take a photo before doing modifications, so here's the seller's photo. Found here.
Then I lightly repainted them with silver acrylic to tone down the shine and match them to the settings. Luckily, having pin backs already they were really easy to attach, and I can even remove/replace them as desired.

I also added more ribbon, black organza this time, with a bow on the bottom of the setting and a single length across the satin ribbon bows.


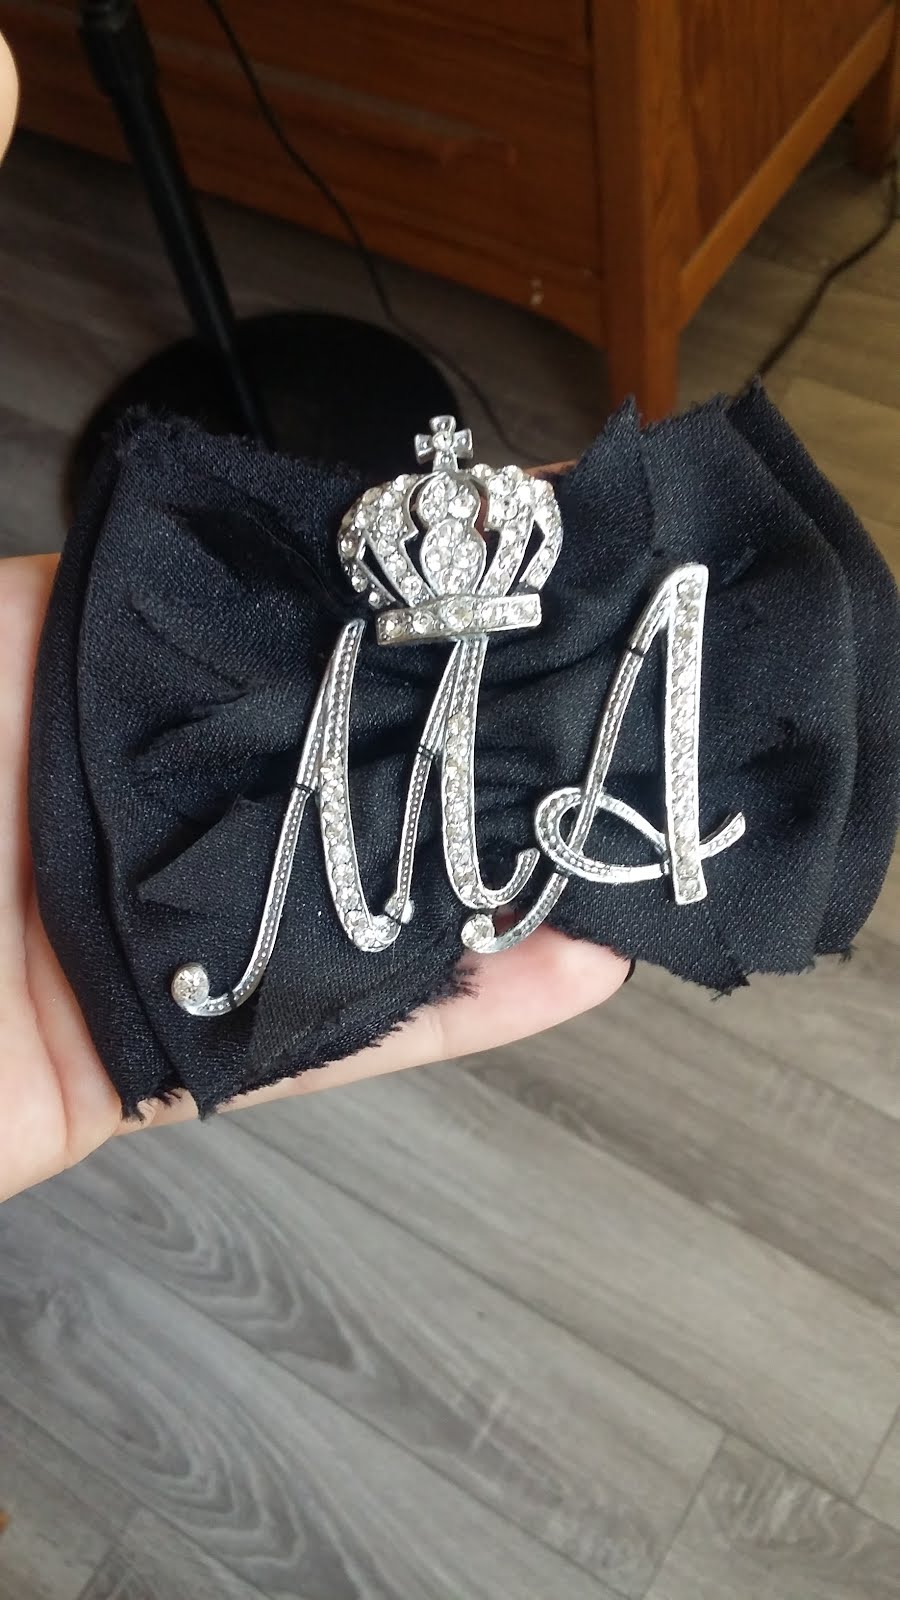
"MA" lady-in-waiting badges
These have a place in 18th century history, but not necessarily in France, so they kind of straddle the line of accuracy and artistic license. I based them off the "badges" worn by ladies-in-waiting to female royalty, featuring the woman's jeweled initials on a ribbon bow. The era-appropriate examples I could find were all Russian, but at various times they were used in other countries as well. They have a fun history, and again, Beauty From Ashes talks about them some here in connection to other royal orders. I figured that since France had a cultural influence on Russia, and Russia and Austria had some political connection, and Marie Antoinette was Austrian... well, this wouldn't be too much of a stretch to say it's historically plausible, especially in an unofficial capacity, even if it didn't actually happen.

I got some appropriately swirly and Rococo-ish - and, of course, sparkly - letter brooches in "M" and "A" for the queen's initials.
Seller's photos. Found here.

I also got some more crowns for these, since the badges almost always have them.

I followed Beauty From Ashes's royal order sash tutorial for the bows, making some changes to allow for a better fit on the shoulder. The first layer is a 4" wide loop, the middle layer is a 3.5" loop, and the top is a single layer 3" wide with pinked edges. They turned out a little messy because I was making them quickly last minute, so I'll be going back and redoing them at some point, but they turned out well enough for the night.

Hair doodads
I knew I wanted feathers in the hair almost from the start, and the rest of the ribbons and such to go with it kind of happened as the entire costume got more elaborate. Two ostrich feathers was kind of the benchmark, and initially I was going to do one each of white and black. But I didn't like the asymmetry. So the plan evolved a few times and we ended up with two black and one white.

The "brooch" is the center of the necklaces that I removed when I was modifying them (having swapped them with the actual brooches that I had originally ordered for the hair).  I used strips of the same black fabric from the lady-in-waiting badges to tie everything together.


Sash "Buckle"
Modifying the necklaces left me with four center pieces, and after doing the hair doodads I still had two pieces left. There was really no need to add them to the costume, but at that point I figured I might as well just on principle. The more ostentatious sparkle the better. The only place left to put anything really was on the waist sash, and as luck would have it the necklace pieces were exactly the same length as the ribbon width (3"). I added a pin back to the top and that was that.

Fans
This project was continually evolving, and this whole new detail was thought up just within the last few weeks. I really came to it by thinking of ways to accentuate the French theme, as well as the zombie theme, so I looked up "brains" in French and fell down the rabbit hole.
They might be undead, but they've still got manners.
I needed something for that to be written on, and fans were the most obvious solution. They're a better and more convenient accessory than a sign or something would be, and have the added benefit of being practical.

The fans themselves are the very basic bamboo slat and fabric variety. We went through a ton of handwritten and calligraphy fonts and picked some that were the most suitable for historical context and/or kind of rough. I painted the slats and fabric edge silver, and my friend did all the Photoshop whatnot and painted the text on.


They hang from the waist by a length of black organza ribbon, tied to the waist sash.

Next, the finish line!