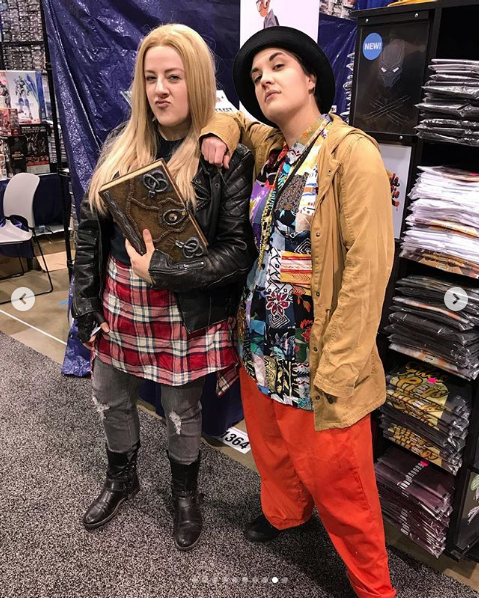
This project is definitely not really in progress right now but I've been dabbling with fabric research and swatches again, so in the spirit of sharing something new that's not just a recap of last year I figured I'd post it (and on Halloween of all days!).
I knew going in that this project would require a lot of research and trial and error, and fabric swatches are a key part of that. But I don't think I've ever ordered so many swatches for a project, and especially not this many types of fabric.
Winifred:
The coat:
 |
| Beautiful, luscious green velvet. |
 |
| Sheer sleeve trim. |
 |
| Sheer sleeve trim. |
 |
| Coat lining. |
I still had a swatch of kelly green velvet for the coat from when I dabbled with these costumes years ago, and I still love this fabric so much.
I've swatched some other velvets and looked at a few in stores and nothing has beat this, so it's definitely a winner.
Mint green chiffon and olive sheer voile for the coat sleeve trim.
I've been back and forth on these constantly. I like the drape of the chiffon better, but I think it's a little too vibrant and opaque. The voile is a bit stiff and just looks and feels a little more polyester plastic-y, but I think the more subtle color and sheerness are a better screen match. Then again, the chiffon seems closer to some of the display photos.
Then again, washing and handling seems to help with some of the voile's stiffness. This might take some actual yardage to see how it drapes and moves.
Poly lining in sage green, pistachio, and dark sage for the coat lining.
In person, the sage is lighter and more seafoam-y, so there's actually more of a contrast between them. But I'm leaning towards pistachio or dark sage. The pistachio compliments the velvet okay and is a nice light color that should take purple dye well, while the dark sage blends in with the velvet and will be a more subtle contrast (which I think I prefer). I still need to do some dye tests with purple to see how the finished result would look.
The dress:
 |
| Sleeve lace and undersleeve netting. |
 |
| Sleeve lace. |
Kelly green peachskin and kelly green challis for the body of the dress.
These were pretty close, but the peachskin is just a little better in terms of color (a little more yellow-green) and weight (a little heavier). It also barely wrinkles, while the challis wrinkles really easily, and I'm all for low-maintenance costumes.
Purple crinkle poly, purple crushed charmeuese satin, and plum crushed charmeuese satin for the center panel of the dress.
The crinkle is pretty much perfect. It has a very faint sheen, which I think will help it move well without being too shiny, and the texture and color are a dream: perfect little uniform crinkles, and a really nice rich purple that ranges from nearly perfect to just a little warm depending on the dress photo. The plum crushed charmeuse isn't quite vibrant enough, but the purple has a really nice color, and even having more sheen it seems to still match the dress pretty well. This might just come down to preference of wrinkles.
Off white cotton crochet lace for the dress sleeve trim.
I actually found this for Billy's shirt first, and then realized that Winnie's lace was really similar (just purple instead). So I decided to double up and just get more of the same stuff and dye it purple. As a rule I generally hate dyeing things, but lately I've been using Dye-Na-Flow more and more, and it takes a lot of hassle out of the process. This project has a lot of unavoidable dyeing anyway, so what's a little more? And having Billy and Winnie wear the same lace is kind of fun on a meta level.
For the undersleeves, I'll be buying purple cheesecloth and weaving it through with yarn for the lines.
Because of how I
think the dress needs to be constructed, the green will probably be lined in front, and for that I'll use the same green poly I choose for the coat lining.
The petticoat:
 |
| Petticoat hem visible under dress. |
 |
| Petticoat and trim. |
Cherry red crushed charmeuese satin and burgundy crushed charmeuese satin for the petticoat.
I thought the burgundy would be the clear winner, but in person it's too purple-y (more like wine). The cherry red is a great color though. The texture is fun, and the wrong side is matte enough that it negates the worry I had about using satin as a cheap-but-maybe-not-so-accurate fabric option. But lately I've been thinking about the actual construction of the petticoat and how to make it more multi-purpose to use with other costumes. So I decided to make it like an 18th century petticoat to wear it for historical stuff too, and I'll end up just using the same cotton-poly broadcloth I've made my other petticoats out of.
Red venise lace (DressyJessie) for the petticoat trim.
Speaks for itself. BEAUTIFUL. Looking for the trim is actually what made me think about reusing the petticoat with other historical costumes, because I just want to show this off all the time.
The bloomers:
 |
| Bloomers fabric and trim. Shows what looks like a shorter row of pointed lace that goes over the top of the fringe. |
 |
| Bloomers trim. |
 |
| Bloomers trim. |
 |
| Another potential sighting of the extra lace. The darker pointed lace at the top should be the petticoat, and I think the lighter, more scalloped lace in the center of the image might be the short lace that goes over the bloomers fringe. |
Red diamond cut-out lace (Stylish Fabric) for the bloomers.
I'm
so, so happy to have found this, because it's a very close match for a
very particular fabric. The bloomers might never show so it doesn't
really matter what they look like (I could even go so far as to skip
them), but just knowing how accurate they are will be gratifying.
Red knit ITY jersey, red interlock knit, red matte milliskin, red shiny milliskin, and red cotton jersey for the bloomers lining.
I came really close to just getting the usual poly lining, because it's cheap and works great. But with the outer diamond fabric being stretchy, I can cut the bloomers slimmer around the waist and hip to reduce bulkiness under
the dress but still be comfy and able to move around. This only works if the lining stretches too, of course, so I decided to try a stretch knit. I have a thing about textures, and something about the feel of the interlock gives me the heebie-jeebies. But the ITY jersey is pretty nice: soft and fairly smooth, good stretch and color. The milliskins and cotton jersey are still pending the arrival of swatches, but I have high hopes for them.
Red venise lace fringe for the bloomers trim.
Like the petticoat lace, this is kind of self-explanatory. Beautiful stuff, and has just the right look. If I have leftovers from the petticoat I might add some of that to the bloomers too, for the hypothetical extra row of lace at the top of the fringe. (I also have leftover venise lace from Lucille Sharpe's nightgown that would work for the extra row on the bloomers after a quick dye job.)
I was originally planning to do black suede boot covers for the shoes, and I still might, but first I'm going to try to permanently modify a pair of boots. If that doesn't work, I know Fabric Empire has great faux suede.
Billy:
Billy's stuff is so distressed and decayed, that on the one hand I have a little more wiggle room than usual with the fabric choices because it won't look the same after so I don't have to worry about matching so much; but on the other hand, it'll help to choose fabrics that are already textured to make the distressing process easier and add some visual interest. Color is also tricky, because the coat and breeches are weathered differently, and all of Billy's scenes take place at night and aren't well-lit.
The coat:
 |
| Lots. |
 |
| Of. |
 |
| Texture. |
Brown cotton gauze and various cheesecloth for the coat.
 |
| Obviously I won't be using pink cheesecloth on Billy, but it gets the textural point across. |
The gauze is fairly lightweight, so if I go that route I might have to play with interfacing (depending on how the gauze layers with lining). The cheesecloth adds great texture, but I'm worried it'll hide so much of the gauze I'd be better off using a plain cheaper fabric as the base. Which would be fine, but I do like the gauze for the option of tearing holes in the cheesecloth so texture still shows through from underneath. I really admire
Cosmicsaur's amazing Billy coat, so I might do a similar technique and apply small strips of shredded fabric for the tattered bits, rather than having a whole solid ratty layer. In that case, the gauze will look nice for an overall distressed look that more rotten spots can be created on top of. I'm also thinking about cutting the coat pieces so the slightly pleated texture of the gauze runs horizontally to help match some of the texture seen on screen.
Brown crushed charmeuese satin and brown crinkle polyester for the coat lining.
The lining was a bit of a challenge, because I need something that can facilitate movement with the shirt and waistcoat (not let the coat cling to the other layers) but it can't look too crisp/modern/pristine. So these fabrics are a lifesaver. The crushed satin has a more random and distressed crushed pattern which looks like natural weathering, and the wrong side of the fabric is matte enough to be a little more subtle (and again, look more dusty/old and less shiny/fresh). The crinkle poly has a more uniform and subtle pattern, and the fabric is more matte. The lining looks green-ish in the movie, but I'm hesitant to stray from the brown-grey-black palette and neither of these fabrics come in an appropriate dark green. So that'll take some consideration.
The breeches:
Brown cotton gauze again (?).
The coat and breeches look like they're different fabrics, but it's hard to tell with the heavier distressing on the coat versus the fairly intact breeches (and again, the low lighting throughout Billy's scenes). My current theory is to use the same fabric as though they were a matching suit, and then let the layering/weathering on the coat distinguish them a bit.
Based on the texture in that behind-the-scenes photo, I'm also thinking about maybe some twills or tweeds for the coat and breeches.
??? for the waistcoat.
It's been incredibly hard to find a fabric that's affordable, non-stretch, black and gold/silver, and striped in the right width. This might come down to making my own. Luckily plain black fabric can be had just about anywhere for cheap enough (I might even have enough in the stash) and I already have tons of gold/silver paint. (The waistcoat stripes look gold-ish to me, if anything. But the buttons are all silver and the metallic trim looks silver too, so I might just do silver or at least grey stripes to make it all match—which is what makes sense both historically and for the character color palettes in the movie.)
The shirt:
 |
| Shirt and ruffle. |
 |
| Lace ruffle detail. |
 |
| Lace cuffs. |
|
Ivory cotton gauze for the shirt.
Basic cotton gauze is basic, but it's just about a perfect texture match, so that's a blessing.
Off white cotton crochet lace for the dress sleeve trim.
Again, this is the same stuff that I'll use on Winifred's dress sleeves. I'm scared and excited to shred it.
Mary:
Mary is kind of a unique part of this project in that the costume is more or less technically done. For version 1.0 I did manage to finish her whole outfit, if not to the standard I wanted, so for version 2.0 I could keep everything and just do upgrades. But there are distinct things I want to change, so more likely I'll be repurposing just some bits and pieces and completely remaking others.
The vest:
 |
| Vest and shirt. |
 |
| Vest cape. |
 |
| Vest cape. |
I used burlap for the old vest, and it looked okay but was stiff and
hell to work with. I didn't want to deal with that again, so I got a
sort of twill fabric that's a lot easier to handle and more pliable. The
cape on the back of the vest was leftover red voile from Mary's skirt,
and I'll probably do the same thing again (or likewise use leftovers
from whatever I remake the red skirt out of).
The shirt:
I've continually struck out finding the right kind of orange
checked/striped fabric for the shirt, so last time I got dark saffron
voile and planned to stitch on the
stripes.
I ran out of time to do the stitching, but I liked the fabric. So that's
still a viable option for the remake, but this time around I'm looking
for striped fabric again and I've found a few contenders with a white
checked cotton in red and orange.
It'll have to be dyed of course, but again with this being a
dye-heavy project I'm not too worried about this piece. Also being
cotton, it'll be an easy process no matter what I use. The different stripe colors give me some options, and I'll do dye tests on both because I don't want the orange stripe to disappear into an orange base or the red stripe to be too bright/contrasted. The simplicity and scale of
the stripe pattern seems pretty spot on, too.
The apron:
I'm happy-ish with the fabric I have, and I don't know I'll ever find something affordable that's
better.
 |
| Perfectly hideous, or hideously perfect? |
So for now the plan is to disassemble the pieces, weather and slightly
customize everything, and then reassemble them more or less the same way
(with a few little technical upgrades). But I'm also getting some crazy
ideas about knitting the apron with specialty yarn. So we'll see what happens.
The skirt:
 |
| Outer plaid skirt. |
 |
| Red and houndstooth layers in the skirt. |
 |
| Houndstooth visible under the plaid, with less difference in skirt length than in display photos. |
The skirt was the most properly finished piece so it more than
anything else could be reused, but it could use some tweaks too. I'm
also thinking about taking a different approach to the construction,
so I might just sell the finished skirt to fund materials for a
completely new one. Whether I use the finished skirt pieces or buy more
yardage, I'll stick with the same plaid I
already have unless I find something better by chance.
I skipped the houndstooth layer last time, mostly because I couldn't find a
woven fabric in a large enough pattern. Last year while thrifting I
found a scarf that's the perfect fabric, and there's just enough to make
a short fake layer that'll be attached to the underside of the plaid
along the hem.
I also want to replace the red under-layer, because the
voile likes to stick to the plaid so the whole thing doesn't drape or
move right. As an alternative, I'm looking at red crinkle poly and red
peachskin.
Either of these are silky enough they should move well under the plaid, so it'll just come down to color and texture.
The bloomers:
 |
Bloomers under the skirt hem
|
 |
| Close-up of the lace trim. |
I didn't do bloomers before, mostly to save time and money, but I want to add them now for the same reason I'm doing Winnie's bloomers: because I can, and because accuracy is cool. I haven't found any definitive photos yet, but the fabric is probably plain white like the trim, so I'll just use something from the stash. For lace, I'll probably get something suitable from the shops I'm getting the other laces from. These are a few good options.
Sarah:
Isn't my responsibility anymore. For the full Sanderson Sisters trio a friend of ours will be doing Sarah, so while I have some theories and might chime in with ideas from time to time, I'm not doing full-blown research and not constructing anything. Bless.
I'm sure I'll be back and forth on these right up until I order the fabric and start sewing, but for now I'm pretty happy with having things this organized.
Happy Halloween, all! And stay tuned!